This
bunting was a surprise gift for my daughter, Megan Kerr.
(The
jubilee bunting making is next week)
She
is taking part in Oxfringe and is giving a free writer's workshop in Oxford on 1st June from 6pm-8pm. I was
delighted with the fabric because it matches her website so well - right down
to the blue sky with clouds and leaves in the "patchwork" background.
http://www.megankerr.co.uk
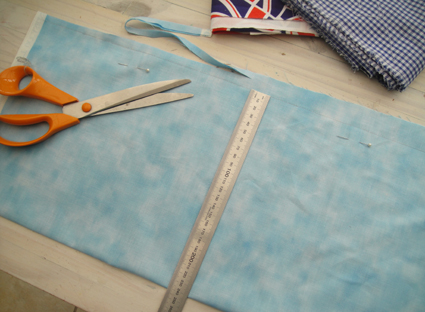
Fold the fabric in half lengthways inside out.
Don't iron it or it will crease the wrong way.
Measure 24cm from the fold to the cut edge and mark
with a pencil.
Use a lead pencil for light fabric and a white
"coloured" pencil for dark fabric.
Draw a pencil line along the marks.
Stitch along this line.
Trim the seam to 1cm. Do this by eye as the flag size
is already accurate.
Place the template on the fabric so that the 2cm part
that joins the templates is outside the seam line.
Draw around the template and cut with pinking shears.
Trim the corners on the flags with seams as per
diagram.
Iron the flags wth the right sides outside.
I don't worry about matching zig-zags when I fold it over - that would
take hours.
Sort them into the order they will be on the cord.
I start and end with a
loop on the cord - this way the string that joins them to a pole or tree can be
any length. Do the loop by hand. I
pin the loop in place before stitching.
Last year (for the Royal Wedding)
we just stitched along below the cord, but the double fabric flapped open in the
wind. So now I backstitch for a few stitches, then go down the zig and up
the zag, catching the cord at the top, but not along the cord as its quite difficult to really do this neatly and its not necessary.
I measure the 4cm distance between
the flags and stick a pin in. Pin the cord on both sides of each flag just
before stitching it. In the photo above you can see that I use the same colour
for all the stitching. I backstitch very carefully and trim the threads as I
go.
When I get to the last
flag, I stitch to within a few centimeters, then cut the cord and make another
loop which I can just hold in place without stitching and I machine over it. I
couldn't take the photo and hold it at the same time so it looks loopier than it
is.
It took me 10 minutes to do 10 flags up to this stage
of sewing and another 20
minutes to make ten flags on a piece of cord, but I was on a roll and all the
equipment was to hand. When working with large pieces of fabric it takes longer
and you need more working space. I have found it easier to cut the fabric into
1/2 meter lengths than to try to avoid
top-seams on some of the flags. If you jiggle and juggle you can organise to have very few top seams, but quite frankly its not worth it for me!