H O M E W E B S I T E E M A I L
Showing posts with label Megan Kerr. Show all posts

Friday, 13 July 2012

Rope of Words 2

My first thought for illustration of the Artists' book is to use Collograph. My experience has been to try it once on a one-day course which I went to because my computer workshop was cancelled!


So here is "Head"


What is collograph?
Okay, in a nutshell! (more in due course):


It is like etching in that a plate is inked up and off-set prints are made from it.
Etched plates are metal and are engraved using acid, but collograph plates are made of cardboard such as mountboard.
  1. The cardboard plate has thin pieces of card, materials, wall paper etc. glued on. The neckpiece is made of wallpaper and the cloche hat is satin brocade. The eyebrows are scratched in and are black from the residue of the first printing. The left side of the face is textured Japanese paper with long threads and the nose, lips and cheek detail is shiny gold card which resists ink.
  1. The collograph is then varnished with shellac or similar.
  2. It is inked up in a similar way to an etching plate - ink is pushed into every single crevice and layered on quite thickly.
  3. The ink is wiped off laboriously and carefully, leaving it in the scratched marks and indentations. It might be wiped over smoother surfaces leaving traces or wipe-marks. 
  4. If you are working in more than one colour as above, different areas would be inked up at the same time so that the borders blend. Wiping down is then even more meticulous. Expect to take an hour to wipe down and "burnish" the plate.
  5. The plate is laid on the printing press bed and damp paper is put on top. 
  6. The printing press is then rolled over the plate forcing the damp paper into the indentations to pick up ink and to emboss slightly

"Head" is a (rather funny) pottery head that I copied. As she has a cavity for flowers, I gave her a headdress.
The template on the left in both photos is the plate which is built up and varnished. I used a peacock feather (which should have been wiped down more skilfully, but you can see how beautifully the textures are reproduced in the print on the right. I cut the head out and gave her a different hat for the image at the top of the post. I also discarded the background.
I really think this way of illustrating has potential and I could even use a real plate for the cover. My only reservation is that the print needs to look as "gorgeous" as the plate.


There is a 2-day collograph course coming up which will be the start of my research.


b.t.w. Here is Head in the garden with some dying daffs!


Wednesday, 11 July 2012

Rope of Words 1 - Artist's Book

I have been fascinated by Artist's Books ever since I first heard of them, and I am already a maker of books. But now my vision is to make a limited edition of books "properly bound".
Of course I have all sorts of other commitments but the gift of working at the Oxford Printmakers (OPC) once a week means I can run a new project alongside everything else.
Below are some of the books I've made, as journals.


I think I'd like the Artist's book to have a covered spine.
Anyway, I've decided to record the project on my blog - the inspirations, frustrations, triumphs and set-backs and ultimately the Book - or Not. 
Time scale: a year or so.


So what are the ingredients needed:
Vision: to make a limited edition of an Artist's Book
huge ambition
staying power
Concept of how it will look when complete: needs exploration
Excellent script: enriched with imagery - I have this - Rope of Words written by Megan Kerr, 5000 words. www.megankerr.co.uk
Illustration style: that will relate to the text and is engaging - needs exploration
Illustration - means of printmaking: a means to reproduce illustration style - needs exploration
Text style: A font or handwritten or digitised lettering style?
Text - means of printmaking: Letterpress (I wish!) or screen printing (accessible)
and that is just the start.


Disclaimer: This may never get off the ground, so I'm taking a chance in doing it publicly. But on the other hand, I've started trying ideas, so that may be worthwhile in itself.

Tuesday, 5 June 2012


Remember the bunting and the banner I made for my daughter Megan for "The Writer's Circle?"

Well, I attended my first ever writer's workshop and I must say, it was fab. It was very interesting being in a workshop where I was out of my comfort zone - as a participant in an subject where I lack confidence. Sure, I write. But I don't do imaginative writing or novels like everyone else on the workshop. This was very good for me, because I give lots of workshops in art and I need reminding about participants can feel.
Megan's on-going writers each read an extract from their novels in various genres from "Dark Urban" to "Fantasy" while we sipped our wine and listened. This was followed by a game Megan invented called "The Premise Circles Game" 


We were in groups of 3 or 4 per table. We brainstormed and took cards which provided prompts to use for creative ideas to build a story outline.


In the photo above you can see two of the cards: Premise & Place.
Hey this was fun! Our final story line was a bit crazy but what an enjoyable hour!
Of course the story took on a life of its own, owned by all or none of us!
No-one could quite tear themselves away from the workshop when it ended!


Well done Meegs!
www.megankerr.co.uk


Monday, 28 May 2012

The Writers' Circle

I've finished the bunting for my daughter's writers' workshop which is part of the Oxfringe Literary Festival - see www.megankerr.co.uk, for details - and thought I'd do a quick banner - I mean quick! I don't really have much more creative-indulgence time for events, what with the Village Jubilee fĂȘte bunting, a group art project at the fair etc.


I found some cotton duck canvas in the loft -as one does - a piece 200cm X 40cm - perfect! Then I typed up her logo font Travelling Typewriter which fortunately  I have on my computer. I enlarged "The Writer's Circle" to 450pt to measure 150cm. The letters were about 10cm high. I did the letters as white with black outlines, and printed them off on a few sheets of A4. I don't know if you can do this sort of thing in Word, but it is easy in a graphics programme. A photocopier would also work.

I drew a pencil baseline lightly on the fabric and lay the first A4 sheet under the canvas, and the letters were just visible. I traced the letters - this blobby alphabet is very forgiving. Then I mixed Lascaux Acryclic and a little water. Using a good nylon round brush #7, I painted the letters quite quickly. The banner took about a hour in all. Voila!


Typewriter Lettering: The letters on old typewriters got quite grubby with bits of fibre, dust etc. and the ones used the most like o's and e's were grubbiest. So these letters often look thicker than the others. Sometimes the o's were "filled in" completely, which we find retro and charming these days. You can see how thin the Capital letters are by comparison.


Wednesday, 23 May 2012

How to make bunting - part 2

This bunting was a surprise gift for my daughter, Megan Kerr.
(The jubilee bunting making is next week)
She is taking part in Oxfringe and is giving  a free writer's workshop in Oxford on 1st June from 6pm-8pm. I was delighted with the fabric because it matches her website so well - right down to the blue sky with clouds and leaves in the "patchwork" background. http://www.megankerr.co.uk


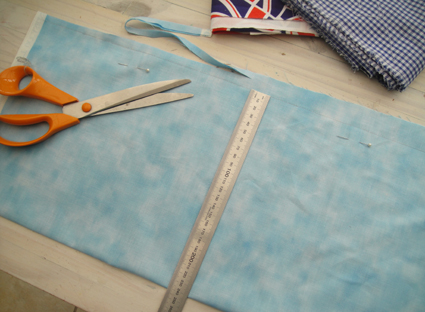
Fold the fabric in half lengthways inside out. 
Don't iron it or it will crease the wrong way.
Measure 24cm from the fold to the cut edge and mark with a pencil.
Use a lead pencil for light fabric and a white "coloured" pencil for dark fabric.
Draw a pencil line along the marks.
Stitch along this line.
Trim the seam to 1cm. Do this by eye as the flag size is already accurate.


Place the template on the fabric so that the 2cm part that joins the templates is outside the seam line.
Draw around the template and cut with pinking shears.
Trim the corners on the flags with seams as per diagram.


Iron the flags wth the right sides outside.
I don't worry about matching zig-zags when I fold it over - that would take hours.
Sort them into the order they will be on the cord.


 I start and end with a loop on the cord - this way the string that joins them to a pole or tree can be any length. Do the loop by hand. I pin the loop in place before stitching. 


 Last year (for the Royal Wedding) we just stitched along below the cord, but the double fabric flapped open in the wind.  So now I backstitch for a few stitches, then go down the zig and up the zag, catching the cord at the top, but not along the cord as its quite difficult to really do this neatly and its not necessary. 


 I measure the 4cm distance between the flags and stick a pin in. Pin the cord on both sides of each flag just before stitching it. In the photo above you can see that I use the same colour for all the stitching. I backstitch very carefully and trim the threads as I go.
 

When I get to the last flag, I stitch to within a few centimeters, then cut the cord and make another loop which I can just hold in place without stitching and I machine over it. I couldn't take the photo and hold it at the same time so it looks loopier than it is.

  
It took me 10 minutes to do 10 flags up to this stage of sewing and another 20 minutes to make ten flags on a piece of cord, but I was on a roll and all the equipment was to hand. When working with large pieces of fabric it takes longer and you need more working space. I have found it easier to cut the fabric into 1/2 meter lengths than to try to avoid 
top-seams on some of the flags. If you jiggle and juggle you can organise to have very few  top seams, but quite frankly its not worth it for me!